
1. Before you begin
In this pathway, you learned how to add a button to an app and how to modify the app to respond to a button click. Now, it's time to practice what you learned by building an app.
You will create an app called the Lemonade app. First, read the requirements of the Lemonade app to understand how the app should look and behave. If you want to challenge yourself, you can build the app on your own from there. If you get stuck, you can read subsequent sections to receive more hints and guidance about how to break down the problem and approach it step by step.
Work through this practice problem at a pace that's comfortable for you. Take as much time as you need to build each part of the app's functionality. The solution code for the Lemonade app is available at the end, but it's recommended that you try to build the app yourself before you check the solution. Remember that the provided solution is not the only way to build the Lemonade app, so it's completely valid to build it a different way as long as the app requirements are met.
Prerequisites
- Able to create a simple UI layout in Compose with text and image composables
- Able to build an interactive app that responds to a button click
- Basic understanding of composition and recomposition
- Familiarity with the basics of the Kotlin programming language, including functions, variables, conditionals, and lambdas
What you'll need
- A computer with internet access and Android Studio installed.
2. App overview
You're going to help us bring our vision of making digital lemonade to life! The goal is to create a simple, interactive app that lets you juice lemons when you tap the image on screen until you have a glass of lemonade. Consider it a metaphor or maybe just a fun way to pass the time!
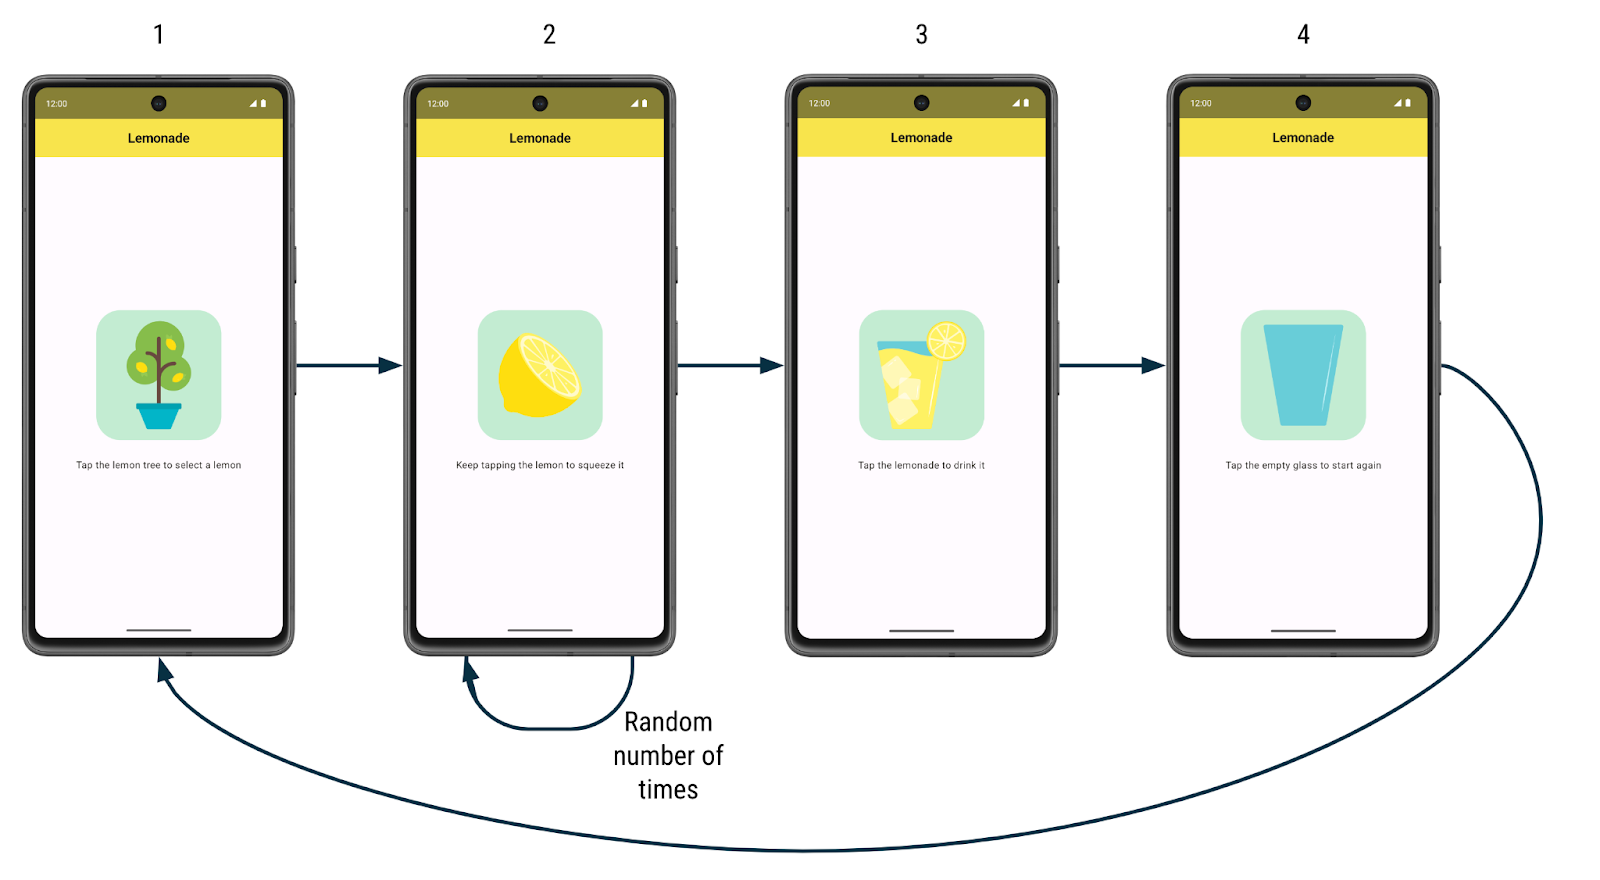
Here's how the app works:
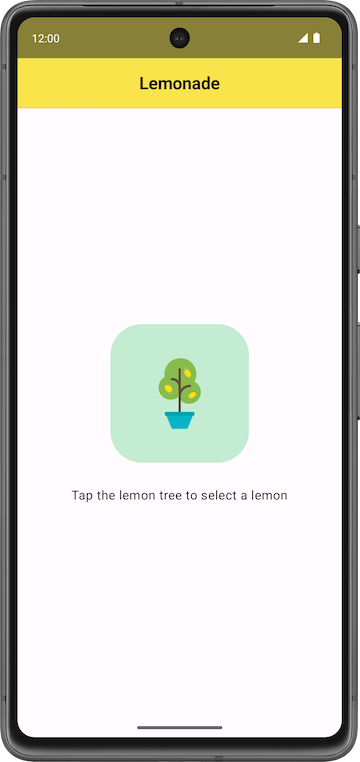
- When the user first launches the app, they see a lemon tree. There's a label that prompts them to tap the lemon tree image to "select" a lemon from the tree.
- After they tap the lemon tree, the user sees a lemon. They are prompted to tap the lemon to "squeeze" it to make lemonade. They need to tap the lemon several times to squeeze it. The number of taps required to squeeze the lemon is different each time and is a randomly generated number between 2 to 4 (inclusive).
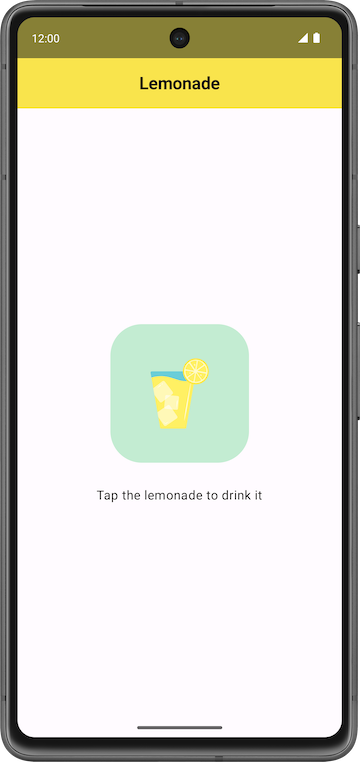
- After they've tapped the lemon the required number of times, they see a refreshing glass of lemonade! They are asked to tap the glass to "drink" the lemonade.
- After they tap the lemonade glass, they see an empty glass. They are asked to tap the empty glass to start again.
- After they tap the empty glass, they see the lemon tree and can begin the process again. More lemonade please!
Here are larger screenshots of how the app looks:
|
|
|
|


For each step of making lemonade, there's a different image and text label on the screen, and different behavior for how the app responds to a click. For example, when the user taps the lemon tree, the app shows a lemon.
Your job is to build the app's UI layout and implement the logic for the user to move through all the steps to make lemonade.
3. Get started
Create a project
In Android Studio, create a new project with the Empty Activity template with the following details:
- Name: Lemonade
- Package name: com.example.lemonade
- Minimum SDK: 24
When the app has been successfully created and the project builds, then proceed with the next section.
Add images
You're provided with four vector drawable files that you use in the Lemonade app.
Get the files:
- Download a zip file of the images for the app.
- Double click the zip file. This step unzips the images into a folder.
- Add the images into the
drawablefolder of your app. If you don't remember how to do this, see the Create an interactive Dice Roller app codelab.
Your project folder should look like the following screenshot in which the lemon_drink.xml, lemon_restart